Here is an image of my circuit.
Here is another image of my circuit.
Here is ANOTHER image of my circuit.

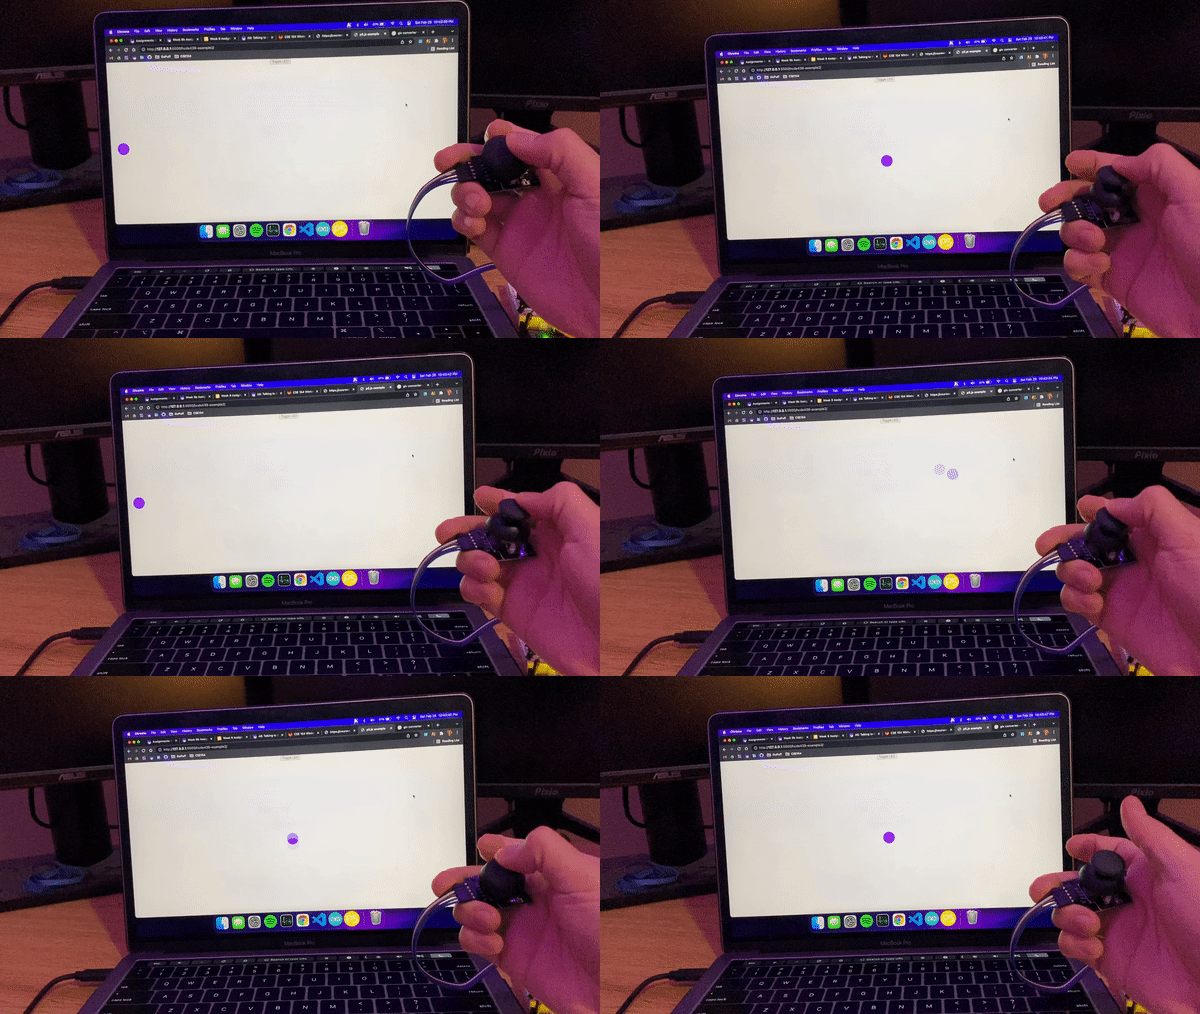
Here is a gif of my circuit working. The circle on the screen will move based on input received from the joystick.

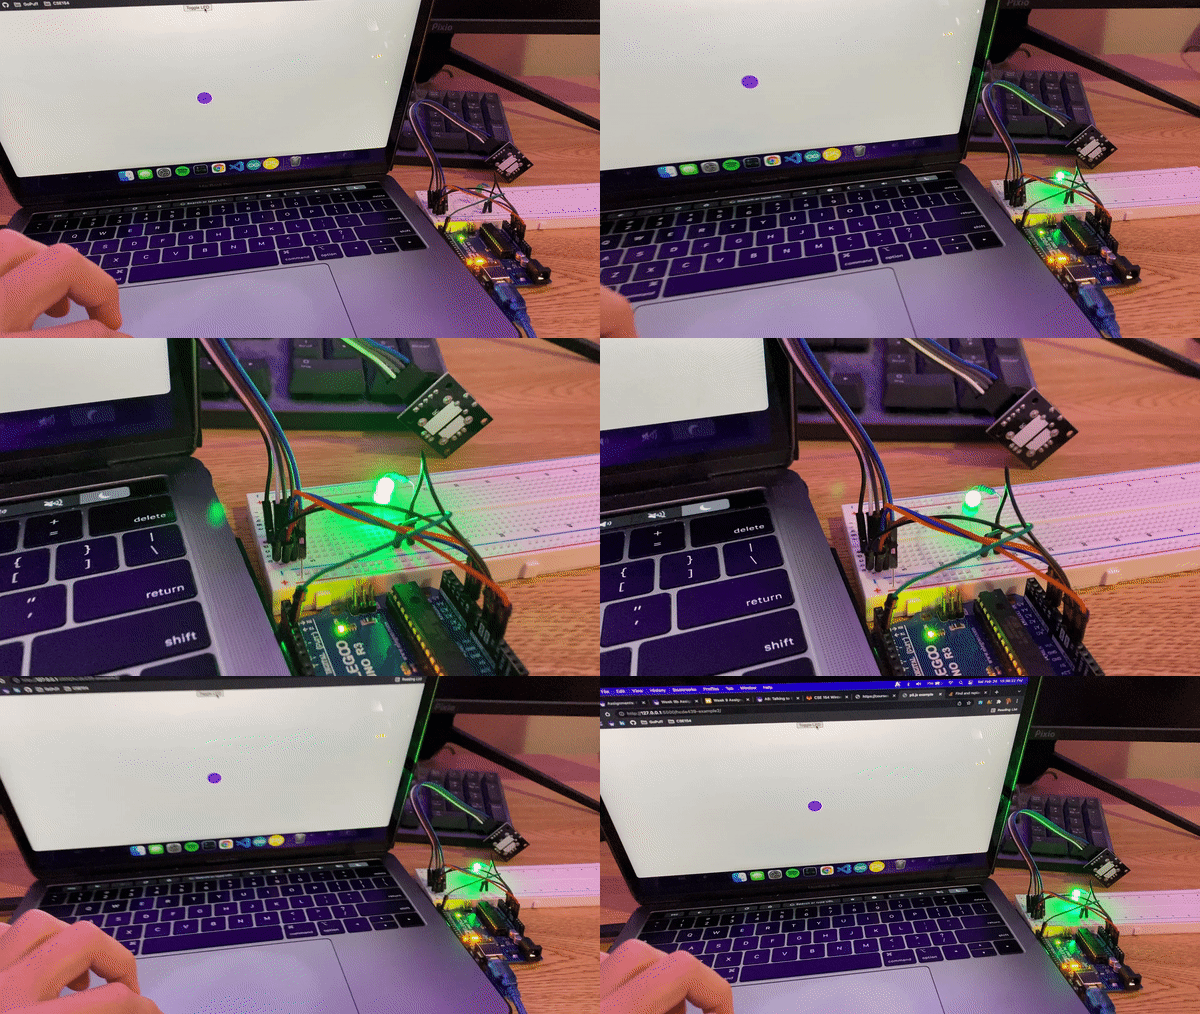
Here is a another gif of my circuit working. The LED's brightness will fade if the button has been toggled/pressed. When toggled on, the brightness of the LED will increase until it reaches its max brightness, then resets. Toggling will stop the LED at whatever brightness it is at.

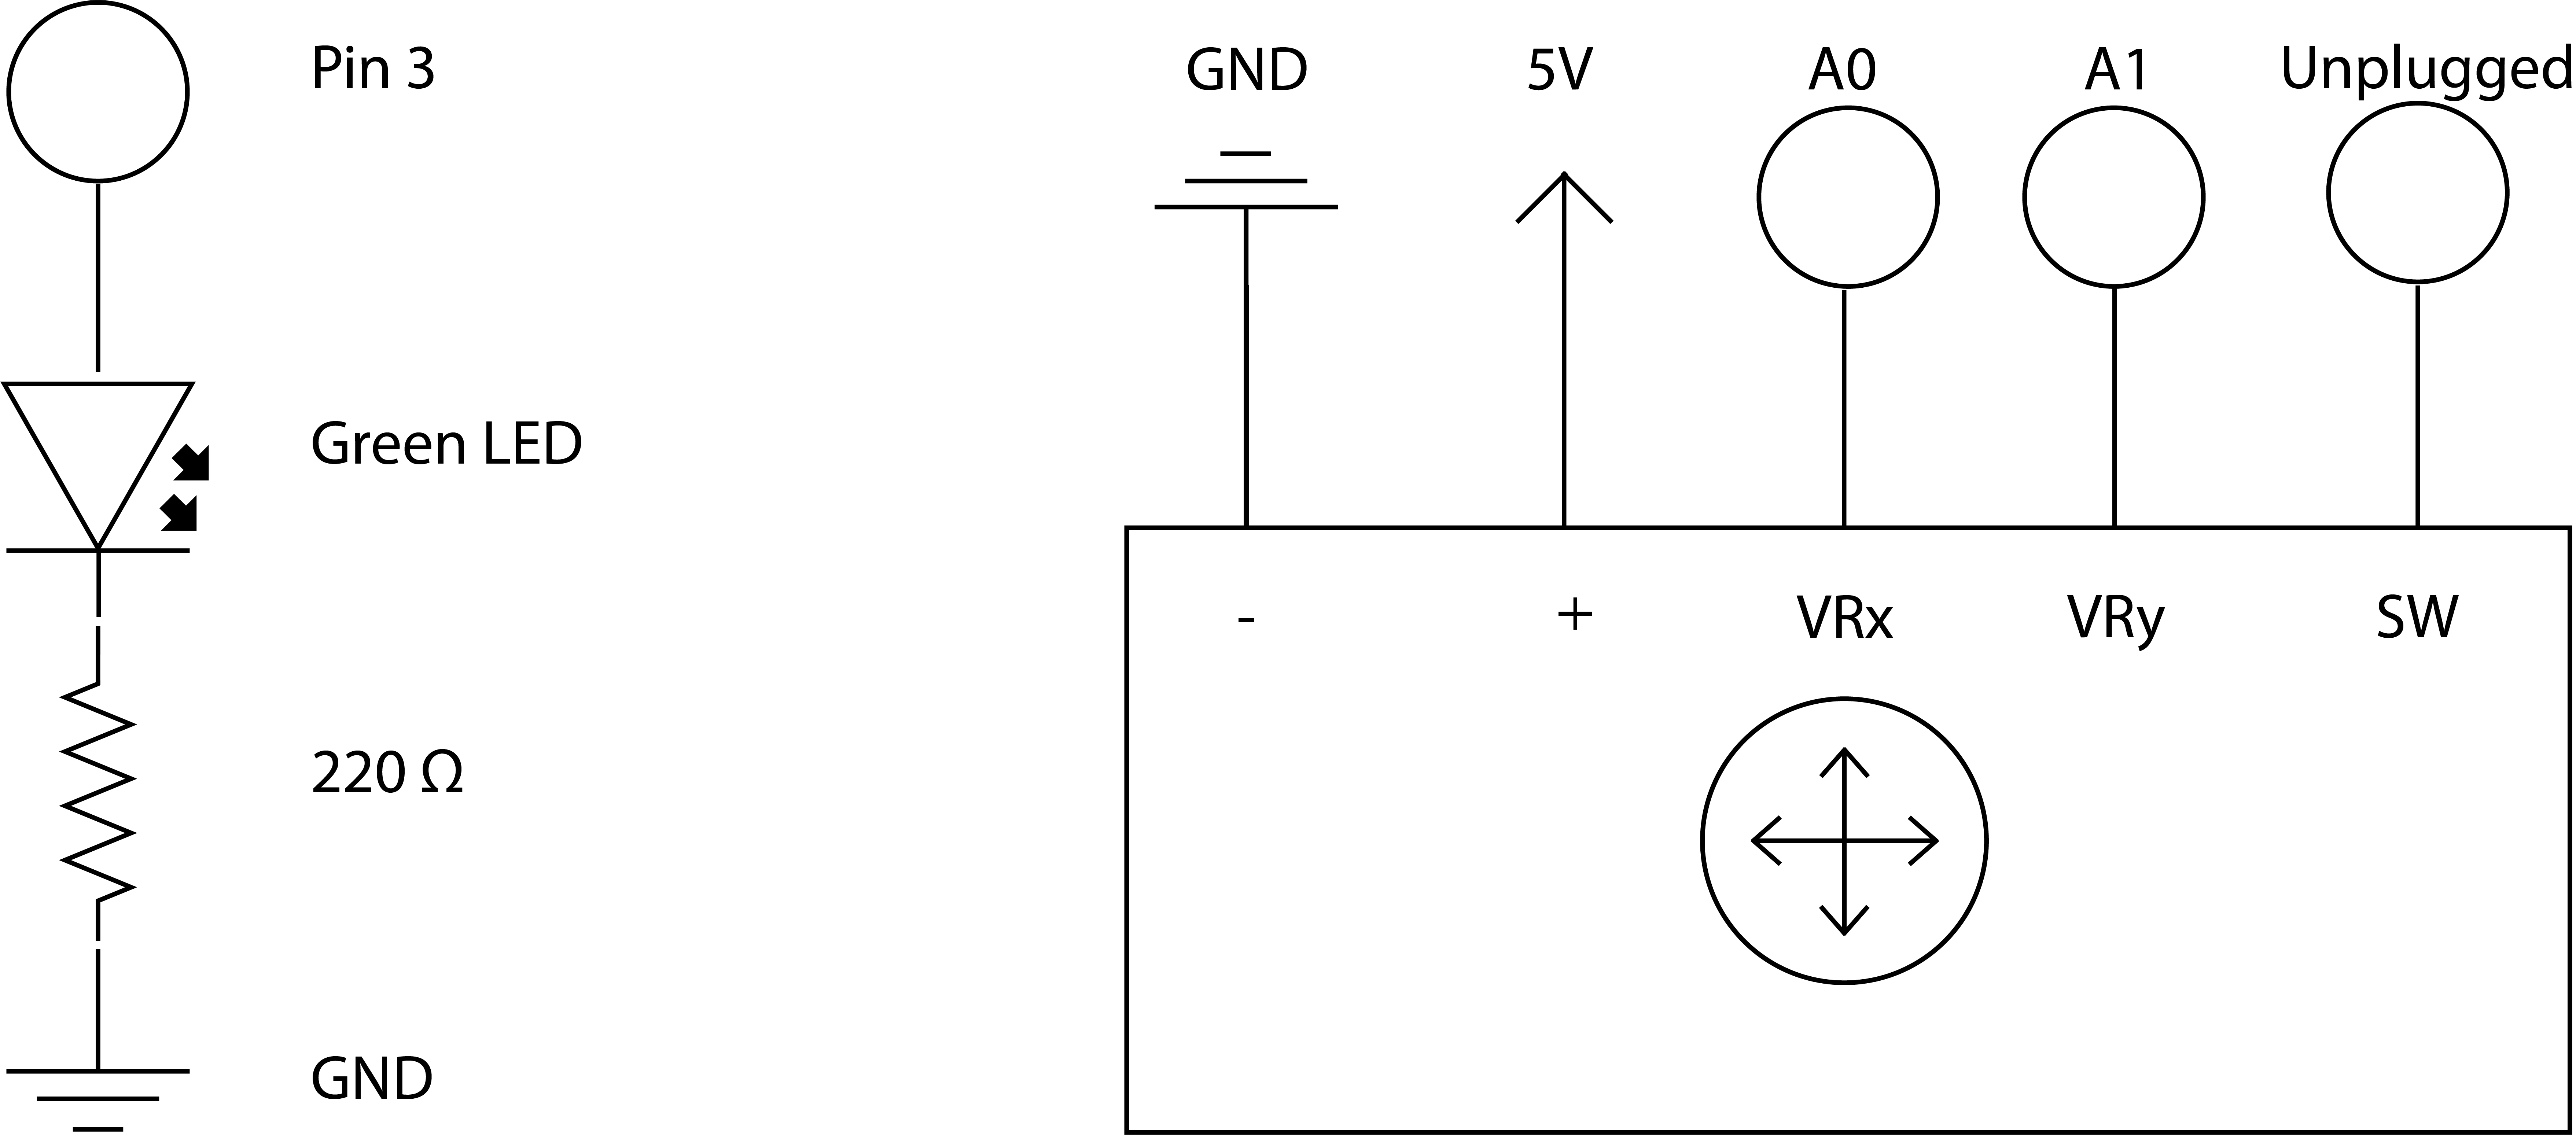
The green LED has a voltage drop of 1.8 v. I had to choose resistors that provided the recommended 20 a. For the green LED's resistor, I needed a (5 - 1.8) / .02 = 160 ohm resistor. The closest resistor I had to this was 220 ohm (I went over to make sure I didn't short the LED). The Arduino Uno has ADC resolution of 10 bits. Hence the values on each analog channel can vary from 0 to 1023 and the home position for the joystick is x: 511, y: 511. The joystick is powered by 5V given through the arduino's pin.

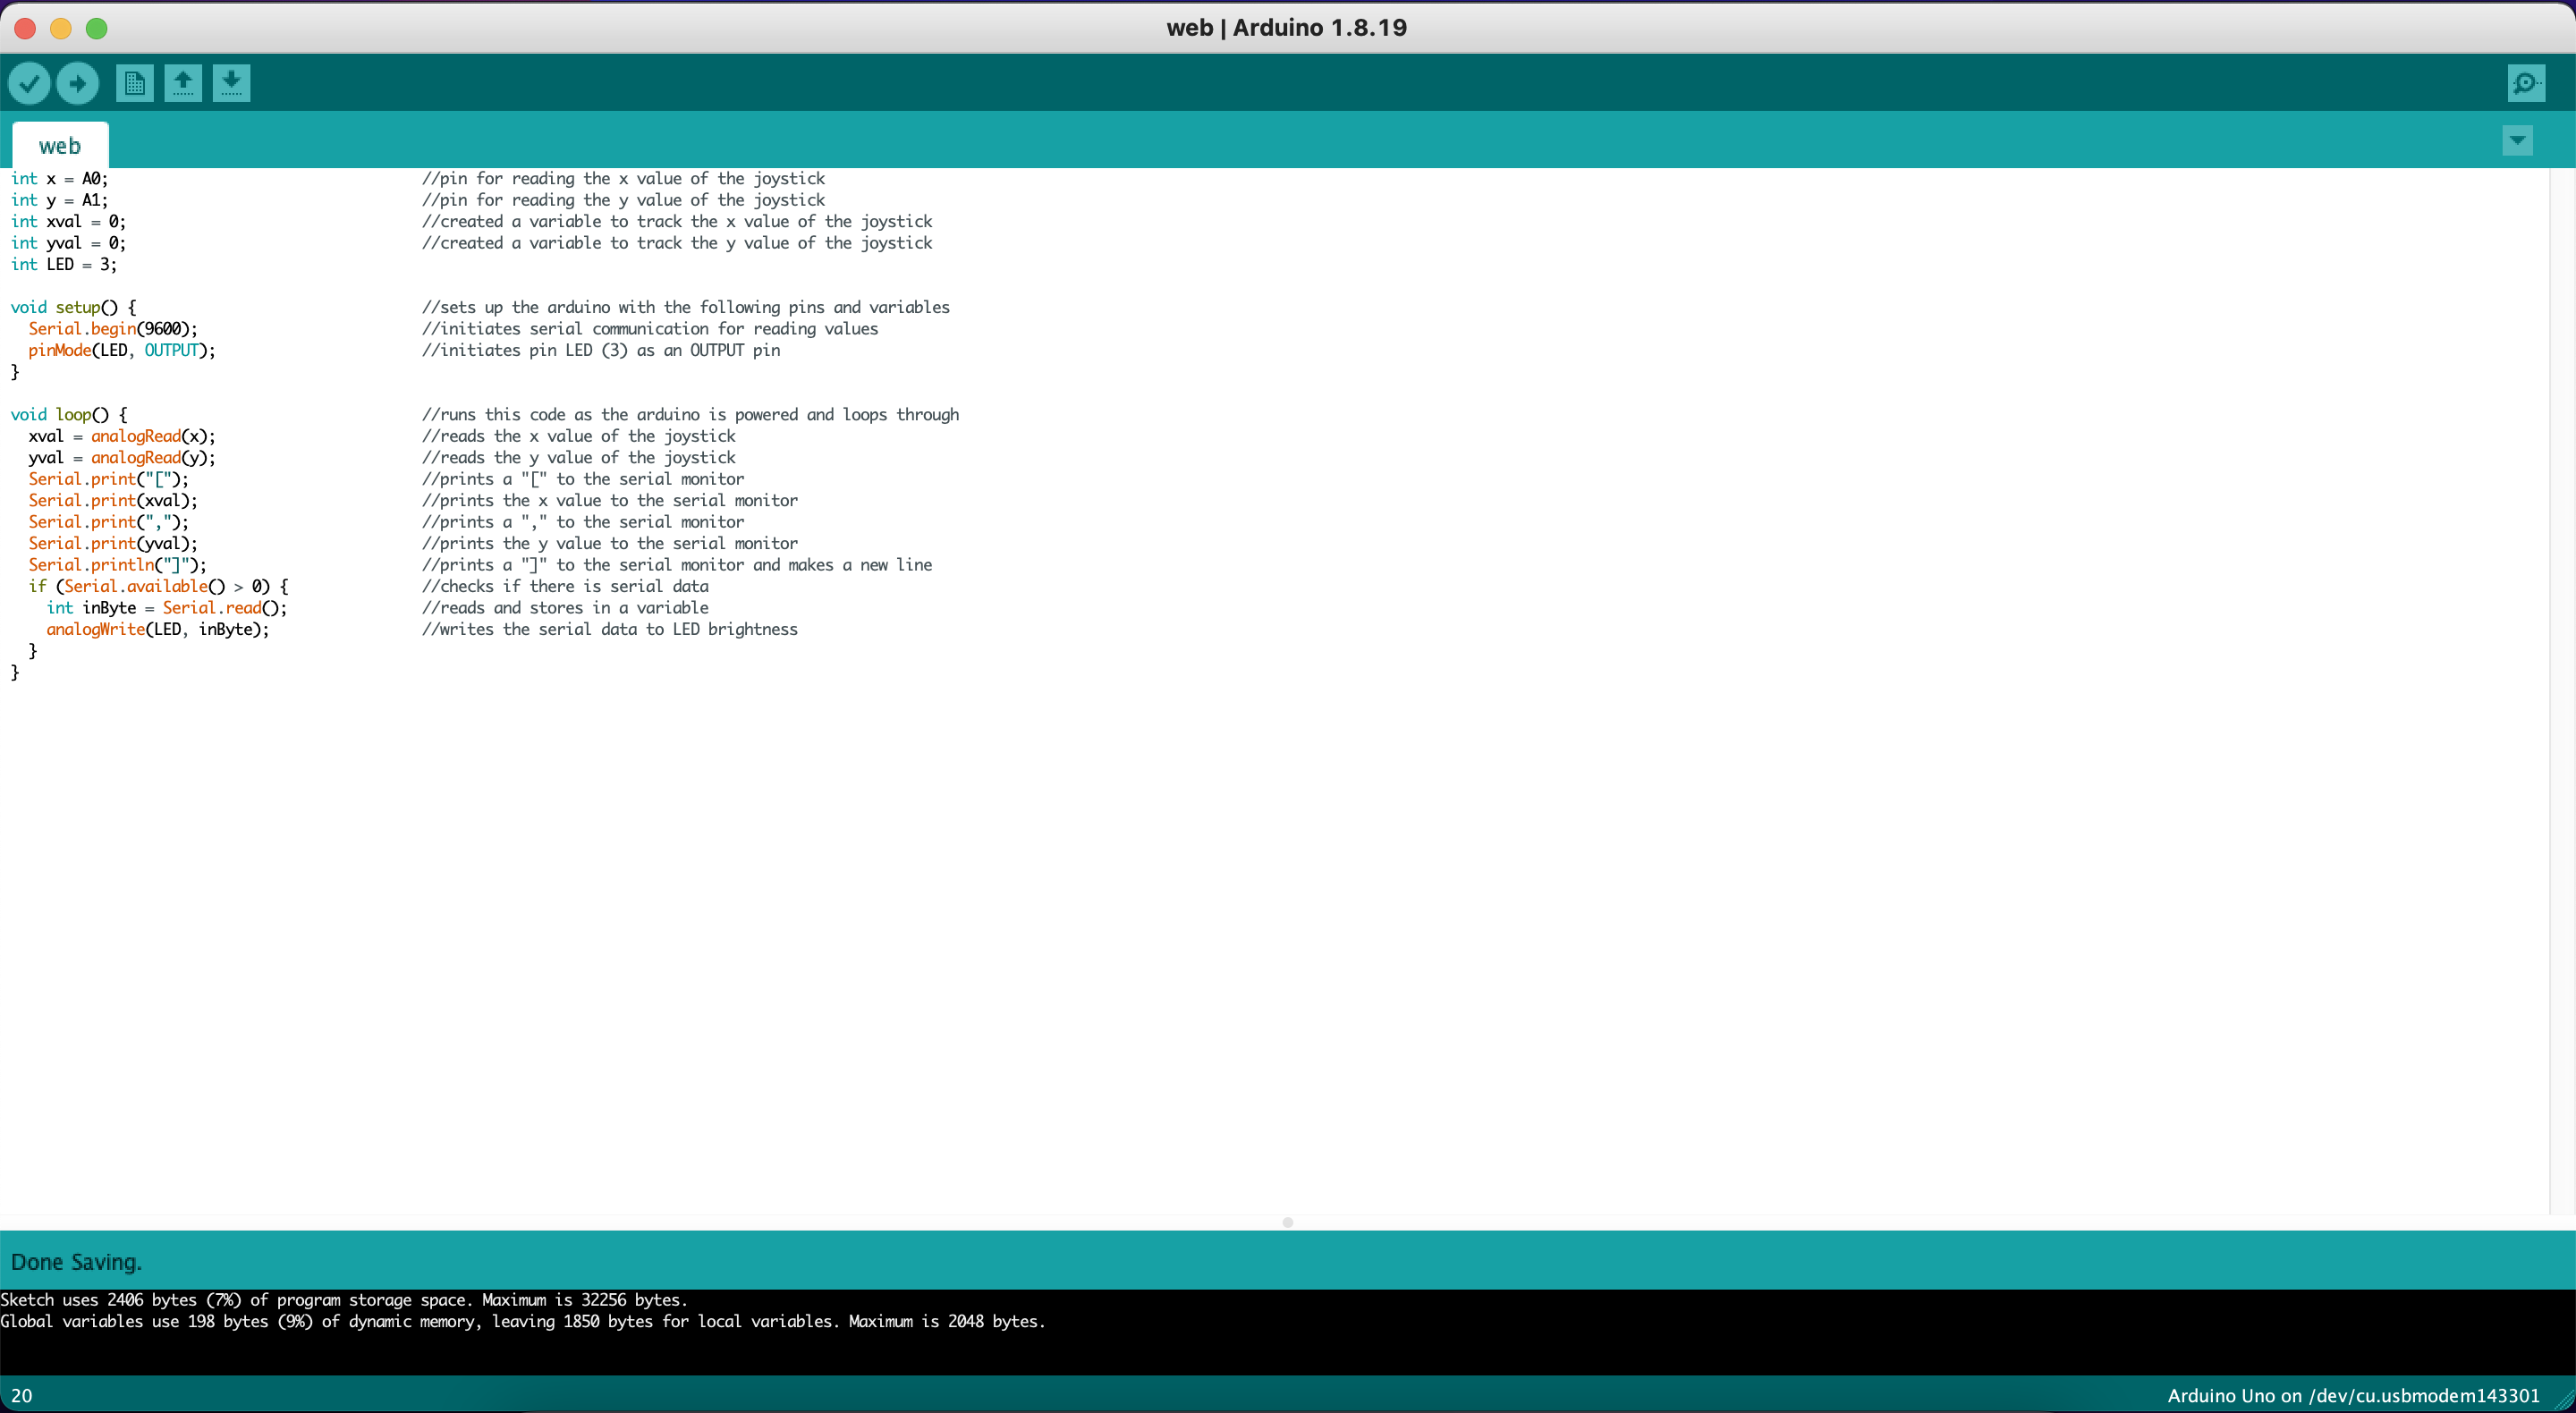
Here is my code with comments explaining how it works. I read the values of the joystick and write them to the serial monitor in the form of an array in each line. The code checks to see if there is any communication from serial and if there is, it will adjust the LED's brightness to be whatever data is read from serial.
Arduino
                        int x = A0;                                   //pin for reading the x value of the joystick
                        int y = A1;                                   //pin for reading the y value of the joystick
                        int xval = 0;                                 //created a variable to track the x value of the joystick
                        int yval = 0;                                 //created a variable to track the y value of the joystick
                        int LED = 3;

                        void setup() {                                //sets up the arduino with the following pins and variables
                          Serial.begin(9600);                         //initiates serial communication for reading values
                          pinMode(LED, OUTPUT);                       //initiates pin LED (3) as an OUTPUT pin
                        }

                        void loop() {                                 //runs this code as the arduino is powered and loops through
                          xval = analogRead(x);                       //reads the x value of the joystick
                          yval = analogRead(y);                       //reads the y value of the joystick
                          Serial.print("[");                          //prints a "[" to the serial monitor
                          Serial.print(xval);                         //prints the x value to the serial monitor
                          Serial.print(",");                          //prints a "," to the serial monitor
                          Serial.print(yval);                         //prints the y value to the serial monitor
                          Serial.println("]");                        //prints a "]" to the serial monitor and makes a new line
                          if (Serial.available() > 0) {               //checks if there is serial data
                            int inByte = Serial.read();               //reads and stores in a variable
                            analogWrite(LED, inByte);                 //writes the serial data to LED brightness
                          }
                        }
JavaScript (P5)
                        var serial;                                                                     //variable to hold an instance of the serialport library
                        var portName = '/dev/tty.usbmodem143301'                                        //the name of my port
                        var dataarray = [];                                                             //data from serial stored in array
                        let timerId = null;                                                             //used to check if a timer started
                        let remainingSeconds = 0;                                                       //tracks amount of time the timer has been going

                        function setup() {                                                              //function called during page setup
                          serial = new p5.SerialPort();                                                 //new instance of the serialport library
                          serial.on('list', printList);                                                 //set a callback function for the serialport list event
                          serial.on('connected', serverConnected);                                      //callback for connecting to the server
                          serial.on('open', portOpen);                                                  //callback for the port opening
                          serial.on('data', serialEvent);                                               //callback for when new data arrives
                          serial.on('error', serialError);                                              //callback for errors
                          serial.on('close', portClose);                                                //callback for the port closing
                          serial.list();                                                                //list the serial ports
                          serial.open(portName);                                                        //open a serial port
                          createCanvas(1500, 1000);                                                     //creates a canvas to draw on
                          background(0);                                                                //sets the background color to black
                        }

                        (function() {                                                                   //anonymous function for callback
                          window.addEventListener('load', init);                                        //checks for when page has loaded to "init"
                          function init() {                                                             //function called when page loaded
                            let button = document.querySelector("button");                              //finds the first button on the html page
                            button.addEventListener("click", function() {                               //adds functionality to button when clicked
                              if (timerId === null) {                                                   //if the timer has not been turned on
                                timerId = setInterval(advance, 10);                                     //create a timer and "advances"
                              } else {                                                                  //when the timer has been turned on
                                clearInterval(timerId);                                                 //turns off the timer
                                timerId = null;                                                         //resets the value used to check the timer's state
                              }
                            });
                          }
                        })();

                        function advance() {                                                            //function called every 10 ms when timer is on
                          remainingSeconds++;                                                           //increments the remainingSeconds
                          if (remainingSeconds > 255) {                                                 //if remainingSeconds is over 255
                            remainingSeconds = 0;                                                       //reset remainingSeconds to 0
                          }
                        }

                        function printList(portList) {                                                  //function called during setup to see ports
                          for (var i = 0; i < portList.length; i++) {                                   //for the portList length, which is an array of serial ports
                            print(i + " " + portList[i]);                                               //prints list to console
                          }
                        }

                        function serverConnected() {                                                    //function called when server is connected
                          print('Connected to server.');                                                //prints appropriate message
                        }

                        function portOpen() {                                                           //function called when port is open
                          print('The serial port opened.')                                              //prints appropriate message
                        }

                        function serialError(err) {                                                     //function called when there is an error with serial
                          print('Something went wrong with the serial port. ' + err);                   //prints appropriate message
                        }

                        function portClose() {                                                          //function called when port is closed
                          print('The serial port closed.');                                             //prints appropriate message
                        }

                        function serialEvent() {                                                        //function called when something happens through serial
                          if (serial.available()) {                                                     //if the serial is working
                            var datastring = serial.readLine();                                         //stores the information from serial
                            var newarray;                                                               //creates a temporary array
                            try {                                                                       //trys the block of code
                              newarray = JSON.parse(datastring);                                        //stores the information from serial into the temporary array
                            } catch(err) {                                                              //if an error occurs in the block
                              console.log(err);                                                         //prints the error
                            }
                            if (typeof(newarray) == 'object') {                                         //if the temporary array/ information from serial is an array
                              dataarray = newarray;                                                     //makes our global array the temporary array
                            }
                          }
                        }

                        function draw() {                                                               //function called to draw on page
                          serial.write(remainingSeconds);                                               //sends remainingSeconds to the serial port for arduino
                          clear();                                                                      //clears the page
                          noStroke();                                                                   //removes stroke from anything below
                          fill("#a742f5");                                                              //fills anything below with a purple color
                          ellipse(dataarray[0] * 1.3 + 50, dataarray[1] / 1.8 + 50, 50, 50);            //draws a small ellipse with position based on global array's values
                        }
This code connects the serial port to an html webpage that uses p5.js. The code will log the status of the port during setup to the console. I added a button with an event listener and timer to toggle if I want my LED lit up or not. I send this data over through the serial port to arduino. The code will finally draw on the page a circle that moves around based on input received from the arduino by parsing what the arduino serial sends, which should look like an array every line. I multiply and divide the values of the array when changing the ellipse's position from joystick input since the joystick inputs values from 0 - 1023 and I needed the ellipse to fit on the page. remainingSeconds is limited from 0 - 255 because analogWrite() on the arduino can only work with values from 0 - 255
HTML
                        <!DOCTYPE html>                                                           declares the document as HTML
                        <html lang="">                                                            sets the language of the html
                          <head>
                            <meta charset="utf-8">                                                   sets utf-8 encoding
                            <meta name="viewport" content="width=device-width, initial-scale=1.0">   sets meta information
                            <title>Joystick and Button</title>                                    sets the name of the page
                            <style> body {padding: 0; margin: 0;} </style>                        styles the page
                            <script src="../p5.min.js"></script>                                  runs the min.js script
                            <script src="../addons/p5.dom.min.js"></script>                       runs the dom.min.js script
                            <script src="../addons/p5.sound.min.js"></script>                     runs the sound.min.js script
                            <script src="../addons/p5.serialport.js"></script>                    runs the serialport.js script
                            <script src="sketch.js"></script>                                     runs the sketch.js script
                            <div style="text-align:center;">                                         aligns a div to the center
                              <button>Toggle LED</button>                                         creates a button with text "Toggle LED"
                            </div>
                          </head>
                        <body>
                        </body>
                        </html>
This code is setup for an empty html page that runs many javascript scripts to support serial connection and p5